Hi, I’m Andrea. I wish I was able to say “I’m excited to be
here blogging from…” but I haven’t updated my blog since my oldest son was 9
months old. He’s 5.5 now. I’m a stay at home mom to two little boys
(Ben, 2 years and Jack, 5.5) and we live outside of Dallas. So, I guess the best I can do is “Howdy from
Texas!” I’ve known Julie since 2004 when
she was my part time employee at the babyGap while she was studying event
planning at GMU. With her sweet, funny
personality, great work ethic and our shared love of Chinese food, she quickly
became a friend more than co-worker, and she has had a special place in my
heart ever since then.
I generally consider myself
to be a pretty creative person. I always
have some project or creation rolling around in my head that I want to create
(or attempt to create) so when Julie asked if I’d help her out with a DIY guest
post, I figured it’d be no trouble at all to come up with something. That is until I realized that I wanted it to
be something good that I’d be proud to show off. I couldn’t think of a single thing that was
blog worthy. I have a Silhouette Cameo,
and I think it’s pretty much the coolest thing I’ve ever owned. I could write love songs or poetry dedicated
to my beloved Cameo, but I couldn’t even think of anything great to do with
that. Plus I hate it when I see a really
cool project and I don’t have the most important thing I need to make; yes, you
could cut the vinyl yourself after tracing your image on it, but let’s be
real…will you? Probably not. I wouldn’t.
So, I did what I always do
when I’m trying to figure out something creative…whined to my husband who told
me, as he always does, that he was sure I’d come up with something great, and
then I turned to Pinterest. I knew that
I wanted to create something to celebrate spring, because it is definitely in
the air down here. I tried a generic
search of “spring craft” and came across a wreath I liked. A wreath…now we’re getting somewhere! I’ve never made a wreath before! The first one I found involved sewing fabric
flowers. Nope, not gonna happen. Although I have a sewing machine, it’s
collecting dust in a closet because I don’t know how to use it. So, I tried searching for “spring wreaths”
and came across this one I loved that looked easy enough to recreate.

Without further ado, my
effort:
What you’ll need: (all of my
supplies were purchased at Hobby Lobby)
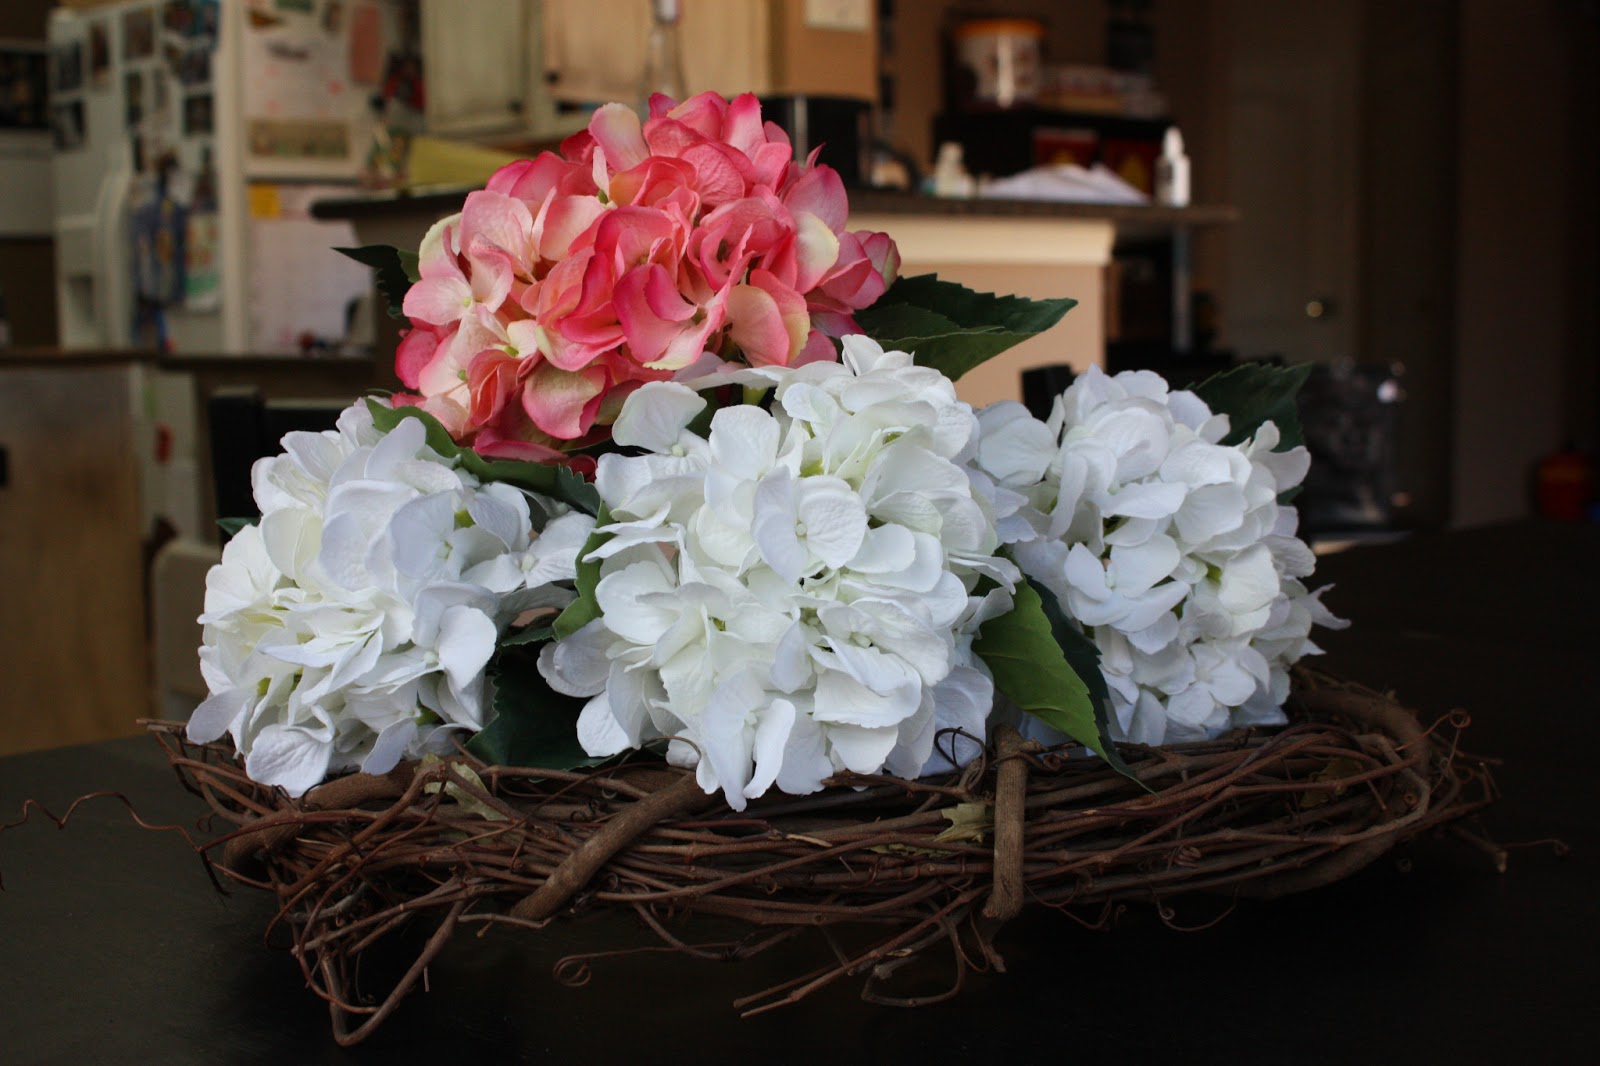
18” grapevine wreath ($4.99)
4-5 silk hydrangea blooms; 1
should be an accent color ($8.99/stem; watch the sales; I got mine for 50%
off!)
4” wooden craft letter
($1.49)
Spray paint/acrylic paint to
match ($5.99—this is definitely cheaper at a home repair store but I wasn’t
dragging my 2 year old to a second store so close to naptime to save $2)

Hot glue gun/glue sticks
Command 3M hook ($4.99 for a
pack of 2 large ones; only necessary if you don’t have anything to hang it from
on your front door).

Step 1:
Carefully cover your work
area (I say this because someone I
know might’ve spray painted some frames red in the garage and didn’t put a
large enough drop cloth down and ended up with red paint on the floor and a
pissed off husband. Because she might’ve done it before with green, too), and
spray paint your letter. The trick, I’ve
found, to spray painting is to always keep your can moving and opt for several
light coats versus trying to get it on thicker in fewer coats. For this project, 3 light coats gave me the
color I was looking for; I waited about 15 minutes between coats to allow. I also like spray paint because it dries
quicker than acrylic and I don’t end up with brush strokes.

Step 2:
Remove your blossoms and
leaves from your stems. Set the leaves
aside.

Look at the stems and think
“I should save these! I’m sure that I
can do something with them! If nothing
else, surely the boys could think of something to do with them…”

And THEN think, “…yeah,
weapons…something to whack each other with, that’s what these will become in
their hands” and throw them away.
Step 3:
With the first bloom in your
hand, cover the end with hot glue and press it onto the wreath. Hold it in
place for 10-15 seconds to give the glue a chance to cool slightly. Once it will stay in place without sliding,
lift up the flowers slightly and apply more glue around the base where it meets
the wreath. Do this carefully because,
DUH, the wreath isn’t solid and the hot glue can drip through and burn the hell
out of your hand that is holding the wreath.
Not that I found this out the hard way or anything, though.

Step 4:
Repeat with remaining flowers;
I like the look of the pink sandwiched between the white, so I did 2 white
hydrangea blooms and then the pink with the last white below it. My wreath was oval shaped versus circle, so I
found that 4 flowers looked better than 5; totally a matter of personal
preference. Between gluing flowers, I
ran out to my garage to give my “W” the additional coats of spray paint.

Step 5:
Grab those leaves and
carefully (again, that glue gun on a grapevine wreath is tricky!) glue them to
the wreath under the flowers as you like.
If you don’t even want to add them, that’s cool, I like the look of the green
peeking out from the full blossoms.

Step 6:
Now that your paint is dry
(or dry enough that you only put faint finger prints in it because you’re
desperately trying to get this done and cleaned up while one kid is napping and
the other is in school), hot glue that puppy to the opposite side of your
wreath. I like the look of it centered,
but it might look cool to place it higher if your accent flower is lower, too.

Step 7:
Stick your command hook to
the door, hang your wreath and step back and admire your awesomeness. Take a picture and text it to your
husband. Post it on Facebook. Drive by the front of your house when you
pick your child up from school and make him admire it. (I’ll bet you had NO idea this is the first
wreath I’ve made or the first time I’ve used silk flowers for anything, right?)

I hope y’all have enjoyed my
little “how-to” and find time to make a little something to make you happy
soon!
Thank you Andrea! What a great project! I've never tackled a wreath before but I just might need to give it a try!!!
Thank you Andrea! What a great project! I've never tackled a wreath before but I just might need to give it a try!!!
No comments:
Post a Comment