Sunday, February 10, 2013

Hunter: 21 Weeks Old


Hunter Man is 21 weeks old!!!


Here are a few things that happened this week:
  • Hunter had his first little fever… 100.3 was his little booty temp...He is doing a million times better now!
  • Hunter has now slept through the night three nights in a row! Sleeping from 9 p.m. to 9 or 10 a.m. in the mornings! I’m so happy that he is sleeping so long but it also makes me just a little sad because I no longer have the early morning feeding before I head off to work. It means more sleep but a little less little man time. But I know that growing boy needs his sleep.
  • Hunter has started to suck his thumb. In past weeks he has often put a few fingers into his mouth… or in some cases his whole hand… Now though after nap time he is often times greeting us with a big old smile and a thumb in his mouth! 
  • Little guy loves to chew on my awesome teething jewelry! Thank you Mrs. Carter!!!!
Here are some extra pictures

Yummy yummy...

Some Daddy and Hunter time!
Thumb Sucking... Looks like little man is sleepy
Hunter loves his big sister! She was out of town for the weekend and he was SOOO happy to see her! 

Saturday, February 9, 2013

Making the world POP!

I'm here to show you that a little spray paint make over can make something that is already an okay decor item and just make it POP!

Emma has wanted a globe for a while and when I found this one for only $5.00 I couldn't pass it up.

The plastic holder however was not doing it for me... It also isn't the look that I want to achieve in Emma's room.

Wait... don't I still have some yellow spray paint left over from her chair project???

After two coats of spray paint... The globe just pops in her room.

Now it actually contributes to the design scheme that I have! AND Emma finally has a globe!


Home Stories A2Z

Thursday, February 7, 2013

New Trash Can for Emma's Room

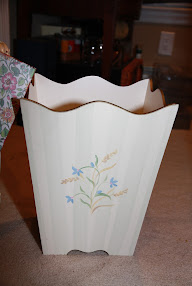
You might remember from my thrift store post that I purchased a great solid wood trashcan for only $3.00


This beauty has some great classic lines… the painting on the side however not my jam…


I can appreciate that some one took the time to hand paint it but it just wasn’t going to work for my house.

The first step was to sand the sides… Emma was super excited to sand and I was happy to have the helper!


After the sanding I applied a coat of BEHR Blackberry Farm paint. I had this paint left over from another project that I took on recently in Emma’s room.
**If you do not have a huge item to print I GREATLY recommend heading to your local home improvement store for the small tester containers. It is an easy and cheap way to get just the right color you were looking for.


After letting the paint dry I did a light sand and applied a second coat of paint. Next I let the trash can dry overnight.

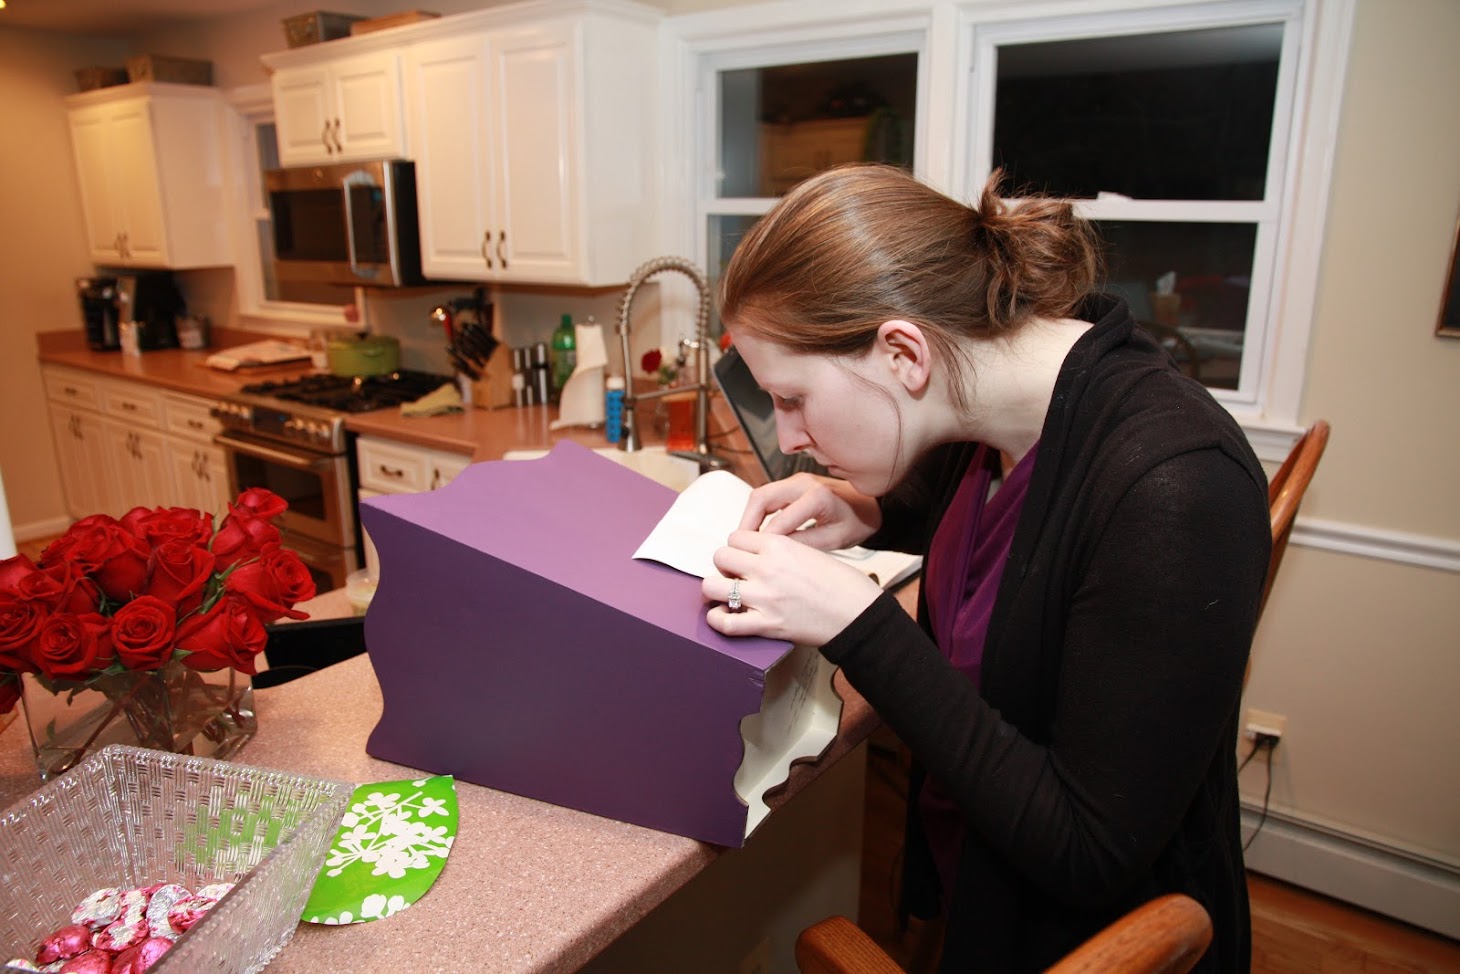
The next day I pulled out my trusty Silouette Camo machine to assist in making Emma’s monogram into a stencil. If you do not have a Silouette machine you can easily print a monogram on plain paper and cut out the letters.


Once the vinyl was cut I removed the letters.. leaving the backing


I really need to get the little tool that makes it easier to lift up  the decals.


Applied transfer paper

Placed the stencil on the trashcan and applied pressure to make sure that it would stick after I pulled the transfer paper off…

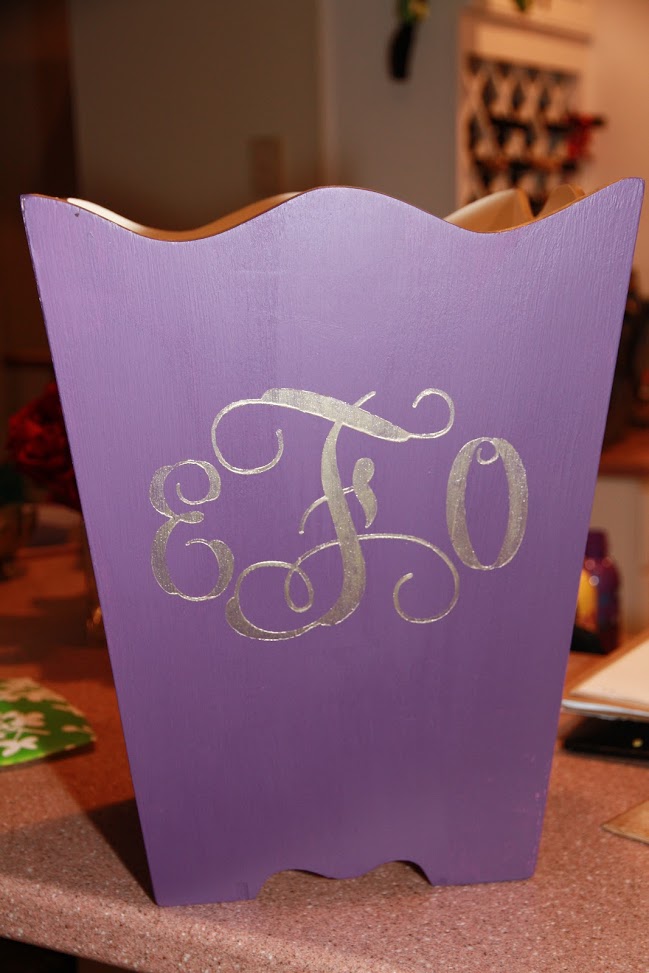
Next I whipped out some gold paint that I had on hand and applied the paint to the stencil.

Pulling the stencil off while the paint was still wet!

I am so happy with the results and Emma loves it too!

** Trash can was purchased from B-Thrifty in Woodbridge, Virginia 

Wednesday, February 6, 2013

Master Bedroom: Before

One of my main organizing goals for February is my Master Bedroom and I'm here to show you the dirty details of what our Master looks like....

Whomp whomp whomp... plain and boring! There is just no personality. The truth is that we are always so focused on our communal areas and our kids rooms that we just have never really focused on our own room.

This is what the room looked like when we purchased the home... Sorry for the bad photo.

Literally we have only done a hand full of things in here in the 2+ years that we have been here:
  • Had the wall painted before even moving in...
  • Moved our furniture in
  • mounted a TV
That shows you what our priorities are :-) We usually cuddle up together on Saturday nights, as a family, for movie night in bed.... so TV was a must have

Here are some UGLY details of the room in the current state:

I tend to PILE crap beside my dresser. I would like for this space to be a little more functional... I need to use the storage that we have behind out bed... or figure out a more visually pleasing way to pile my crap in the corner... perhaps a basket with a lid???

This is what the space looks like behind our bed... we have a bed from IKEA and the console table that has pull out storage on the sides... I love the surface behind the head of the bed but I hate that it tends to become a dumping ground for random stuff... Also, do not let those flowers deceive you... they are from our anniversary and usually not there.

I mean 5 drink containers for only two people, Big pile of magazines, UGLY lights from IKEA that we NEVER use because they give such little light, oh and do not even get me started on the two flower prints that we have just leaning against the wall... We had those before we moved in... and guess when I asked first asked my hubby to hang them??? Bonus points if you guessed that I asked him when we moved in! It's a good thing he is such a cutie! I just want this space to be more functional!

From the bed this is what you see...


Sophie's crate fits perfectly into this corner and is typically left open and she will go in there on her own to rest throughout the day and at night. The only thing is that becomes an easy place to pile random stuff.

Oh the birch Malm dressers from IKEA... how I hate you... I've heard tons of stories about how they break apart for people and are complete junk... we have not been so lucky... These babies have lasted EIGHT years!!!! Matt had them before we even dated! They are in perfect shape and I just cannot justify spending money on new furniture when these are going strong... but I'm thinking that I can justify a low cost face lift??? I hope Matt does not read this blog because this is likely a project he would veto :-)

View of the room from the far corner...
I purchased this great birch mirror from homegoods about a year ago... It was only $129.00!! I LOVE IT because it has the vibe that I wish our entire bedroom had. We need a better solution however because it is currently just propped up against the wall and that will NOT work with a baby on the move!

See that bin... That has Matt's summer shorts in it and has just been chillin in front of our closet for months... Any time Matt needs to get into the closet he just moves it to the side. (Only Matt's clothes are in the closet in our Master because I get ready for work too early in the morning so I get dressed somewhere else so I do not wake up Matt...)

Bed from far side of the room... Can you spot a HUGE issue?

YES!!! that pile of shoes on Matt's side of the bed! We need some proper storage STAT!

And what about this eye sore... Yes that is an outlet without a cover... and an ugly cream outlet! Oh the horror.

So now you have seen the ugly truth about our Master Bedroom... Here is what I am going to take on over the month...
  • Shoe Storage for Matt
  • Clean out Under the bed
  • New (larger) rug down
  • Face lift for MALM dressers
  • Window Treatments
  • Artwork on wall
  • Cleaning off tops of dressers & getting the spaces organized
  • Clean out dressers and purge clothes that we no longer wear
  • Install new white outlets
  • New light fixtures on back of bed
  • Possible new ceiling light fixture 
That is a big list... wish us luck!

Tuesday, February 5, 2013

Here is to a wonderful new partnership!

I am extremely happy to announce that I have partnered with B-Thrifty an AMAZING Thrift Store in Woodbridge, Virginia!

I will be now be a bi-weekly contribute to their blog, Just be Thrifty. It is a new blog but I really think that they are off to a great start by reaching out to DIYers in the local area for contributions. I plan to post every other Tuesday and will highlight projects that I complete with items found in their store.

For full disclosure I will be receiving the items that I will use for my projects at free or discounted rate. Which is pretty much AWESOME! I've very excited about this new partnership!

Please head on over to see the first post... it is mainly an introduction and a recap of the elephant project that I already shared on here earlier in the week.

Monday, February 4, 2013

Date Night: Restaurant Eve

On Saturday night my hubby and I went our to celebrate our two year anniversary. We decided that we wouldn't buy each other gifts this year and that in place of that we would treat ourselves to a much needed night away from the kiddos... a night when we could focus on being husband and wife and not mom and dad!

I had heard some wonderful things about Restaurant Eve from a co-worker/friend and I knew instantly that I wanted to give it a try.


I decided that we would go all out and have dinner in the tasting room where we would have an option of a 5, 7, or 9 course tasting menu. The goal of the evening was to just relax, slow down and experience every bit of the food and I would say that that goal was accomplished!

The second we arrived we were taken to a very private table and we were greeted with some yummy canapes which set the tone for the entire evening.

I also loved that we were greeted with the canapes and a cocktail menu....NOT the dinner menu. It was so nice to know right from the start that this would not be a rushed meal!


Once our menu did come it was personalized with the date and "Happy Anniversary Julie and Matt" at the top!

We decided to go with the 7 course "surprise" tasting menu where the chef picks what each of the courses are AND we decided to do the wine pairing!

These were our courses:

Course One:  
Sashimi of Fluke with Kentucky Soy Pearls, Eve's Garden Lemongrass, Pickled Apple and Red Veined Sorrel

Course Two:  
Poached Main Lobster with Celeriac, Hedgehog Mushrooms and Celery-Caper Relish

Course Three:  
Chesapeake Rockfish with "Pork Vindaloo", Red Garlic Chips and Scarlet Turnip Acher

Course Four: 
 Shenandoah Calley Lamb with Black Garlic Caramel, Bacon Relish, Sunchokes and Pine Nuts

Course Five: 
 Crisp Veal Sweetbreads with Turnip Cream, Lucky Sorrel, Charred Cipollinis, Garlic Root and Lemon Aigre-Doux

Course Six:  
"Grayson" with Calvados Pate de Fruit, Candied Walnuts and Caramelized Onion Relish

Course Seven:  
Warm Sourdough Beignet with Mascarpone Sorbet and Meyer Lemon Curd

Just look at the dessert! Again the restaurant recognized that we were there for a special occasion. 


Everything was amazing... even the sweetbreads tasted good and I'm not typically one to eat brains!

At the end of the evening we were given this little gift bag which included ground coffee and scone mix (Again saying Happy Anniversery!) 

These scones were very yummy on Sunday! 

GREAT dinner and I would highly recommend this restaurant! Expensive but worth it! 

Thrift Store: Gold Elephant Box

Yesterday, on the "unofficial" Macklrmore Thrift Shop Challenge  post I shared a little gray elephant that I scored for only 50 cents from B Thrifty in Woodbridge, Virginia (13412 Jefferson Davis Hwy  Woodbridge, VA 22191)


The second I saw the elephant I knew exactly what project I wanted to take on! My spray paint finger was twitching!

Saturday this beauty received a coat of gold spray paint

After just two coats of paint the elephant was looking GREAT!

On Sunday I pulled out this little box that I purchased about 3 months ago from Jo Anne Fabrics for only $5.00 


I removed the hardware


and I stained the box using MINWAX Water Based Wood Stain in Coffee. We had it leftover from a project in Hunter Man's room... This was actually my first time ever staining anything and I am extremely happy with the results...


Currently the elephant box lives in a bookcase in our living room (appropriately holding up some awesome Cheney books) but I think that after I organize our master bedroom the box will ultimately take up residence in there. I plan to use it for remote storage on the table behind my bed.


I cannot wait to get started on organizing and updating a few things in our master bedroom. The space is currently looking a little sad... When I tackle this room as a part of my February goals I hope to have as much success as I did in January with my Kitchen.

This post also shared on:
This That and Life